> ## Documentation Index
> Fetch the complete documentation index at: https://docs.byterover.dev/llms.txt
> Use this file to discover all available pages before exploring further.
# Connect Agent
> Connect ByteRover Desktop to supported coding agents.
Connect your coding agent so it can use the ByteRover skill from inside your project.
## Before you start
* Install and open ByteRover Desktop.
* Sign in to your ByteRover account.
* Be ready to restart the coding agent after connecting it.
## Supported agents
Desktop can connect ByteRover to these coding agents:
* Claude Code
* Claude Desktop
* Codex
* OpenCode
* OpenClaw
* Hermes
* Devin (Windsurf)
* Cursor
* Gemini CLI
* GitHub Copilot
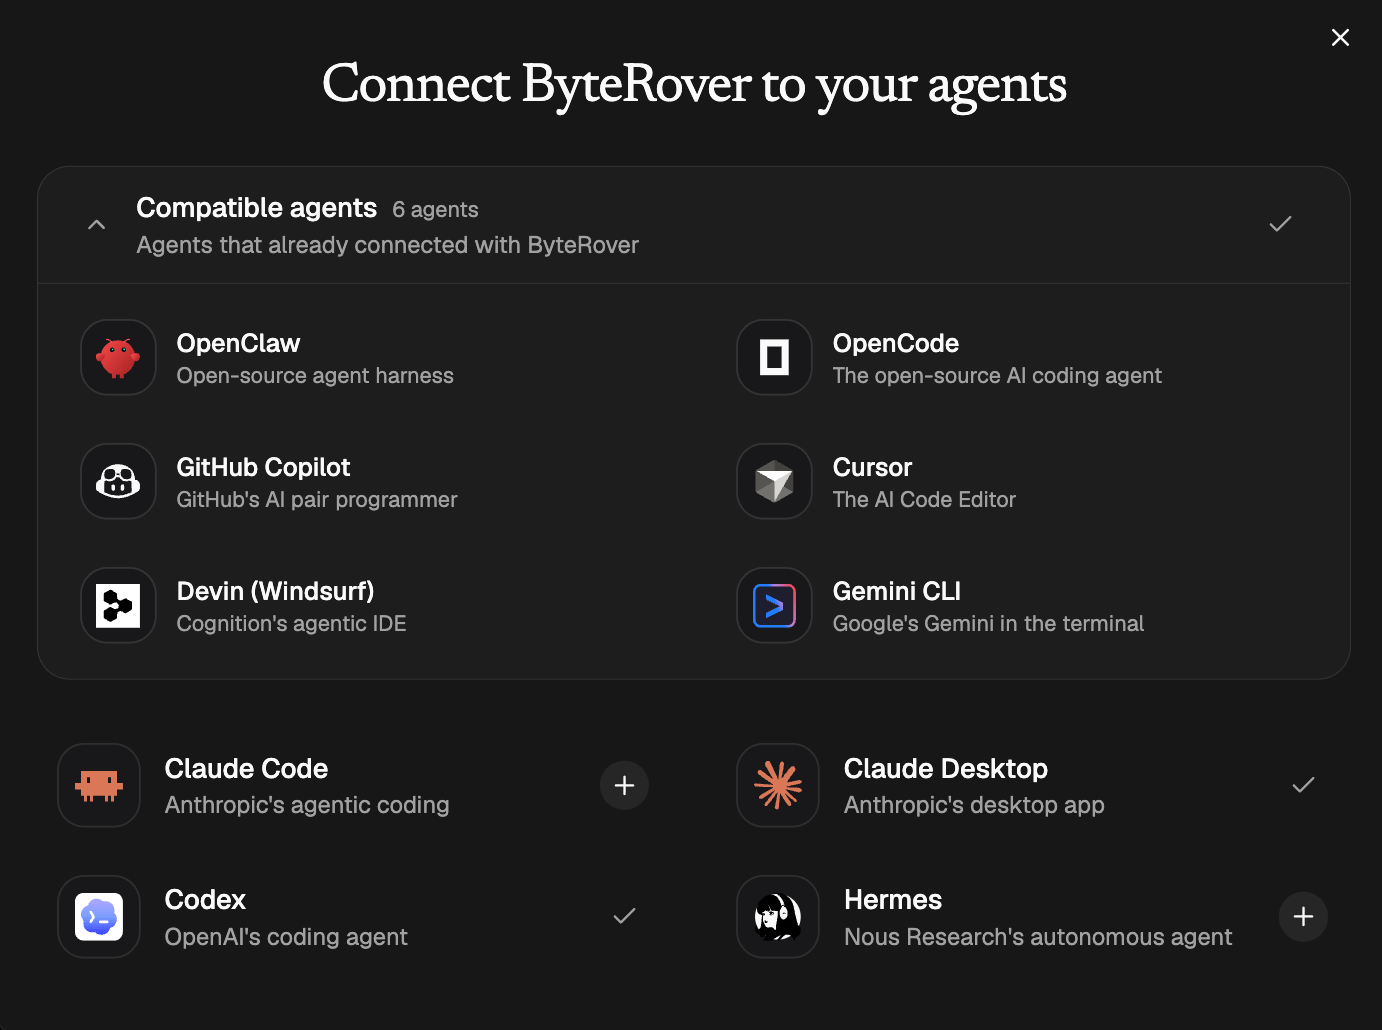
Some agents share the same global skills folder. Desktop may show them together as **Compatible agents**. Connecting that bundle installs ByteRover once for every agent that reads from the shared folder.
## Open the agent connection screen
During first setup, Desktop opens **Connect your agents** after sign-in.
After onboarding, open the same controls from Desktop:
* select **Add agent** if no agent is connected yet
* select **Manage agents** if you already connected one or more agents
## Connect your agent
Find the agent you use for development, then follow the action shown in Desktop.
| Desktop action | Meaning | What to do |
| ----------------- | ------------------------------------------------------- | ---------------------------------------------------------------------------------------------------------------------------- |
| **Connect** | Desktop can install the ByteRover skill for this agent. | Select **Connect**. |
| **Connected** | The ByteRover skill is already installed. | Restart the agent if you just connected it, then onboard with ByteRover. Use **Disconnect** if you need to remove the skill. |
| **Update** | The agent has an older ByteRover skill installed. | Select **Update** to reinstall the latest bundled skill. |
| **Install Guide** | This agent requires manual setup. | Open the guide and follow the steps shown in Desktop. |
Most agents are connected directly from Desktop. Claude Desktop uses an install guide because its skill upload is manual.
When you are in first setup, select **Continue** after the agent connection step.
Desktop **Connect** and **Update** reinstall the bundled ByteRover skill over any existing Desktop-managed copy.
## Update or disconnect
Use **Manage agents** after the first setup.
* Select **Update** when Desktop shows that an installed skill is outdated.
* Select **Disconnect** when you want Desktop to remove the ByteRover skill for that agent.
* Reconnect the agent later with **Connect**.
Disconnecting removes the skill from that agent's install location. It does not delete your spaces or saved memory.
## Use manual install when needed
For VPS CLI agents or manual skill flows, install the published ByteRover skill from the terminal in the environment where the agent runs:
Requires Node.js 20 or newer. Node.js includes npm and npx.
```bash theme={null}
npx skills add campfirein/skills
```
Restart the agent after the command finishes.
The ByteRover skill loads when the agent starts. If the agent was already open, restart it before you try onboarding.
## Claude Desktop video guide
Claude Desktop uses a manual upload flow. When Desktop shows **Install Guide** for Claude Desktop, follow the guide and use this video as the visual reference.
The Claude Desktop flow is:
1. Select **Save to Downloads** in ByteRover Desktop.
2. Open Claude Desktop.
3. Go to **Customize** > **Skills** > **+** > **Create skill** > **Upload**.
4. Upload the `byterover-skill-*.zip` file from Downloads.
5. Return to ByteRover Desktop and wait for Claude Desktop to show as connected.
## Onboard with ByteRover
Open the connected agent in your project and prompt:
```text theme={null}
onboard with byterover
```
The agent will check the current project, connect to the right ByteRover space, and tell you what to do if a space still needs to be created in Desktop.
 ## Before you start
* Install and open ByteRover Desktop.
* Sign in to your ByteRover account.
* Be ready to restart the coding agent after connecting it.
## Supported agents
Desktop can connect ByteRover to these coding agents:
* Claude Code
* Claude Desktop
* Codex
* OpenCode
* OpenClaw
* Hermes
* Devin (Windsurf)
* Cursor
* Gemini CLI
* GitHub Copilot
Some agents share the same global skills folder. Desktop may show them together as **Compatible agents**. Connecting that bundle installs ByteRover once for every agent that reads from the shared folder.
## Open the agent connection screen
During first setup, Desktop opens **Connect your agents** after sign-in.
After onboarding, open the same controls from Desktop:
* select **Add agent** if no agent is connected yet
* select **Manage agents** if you already connected one or more agents
## Connect your agent
Find the agent you use for development, then follow the action shown in Desktop.
| Desktop action | Meaning | What to do |
| ----------------- | ------------------------------------------------------- | ---------------------------------------------------------------------------------------------------------------------------- |
| **Connect** | Desktop can install the ByteRover skill for this agent. | Select **Connect**. |
| **Connected** | The ByteRover skill is already installed. | Restart the agent if you just connected it, then onboard with ByteRover. Use **Disconnect** if you need to remove the skill. |
| **Update** | The agent has an older ByteRover skill installed. | Select **Update** to reinstall the latest bundled skill. |
| **Install Guide** | This agent requires manual setup. | Open the guide and follow the steps shown in Desktop. |
Most agents are connected directly from Desktop. Claude Desktop uses an install guide because its skill upload is manual.
When you are in first setup, select **Continue** after the agent connection step.
## Before you start
* Install and open ByteRover Desktop.
* Sign in to your ByteRover account.
* Be ready to restart the coding agent after connecting it.
## Supported agents
Desktop can connect ByteRover to these coding agents:
* Claude Code
* Claude Desktop
* Codex
* OpenCode
* OpenClaw
* Hermes
* Devin (Windsurf)
* Cursor
* Gemini CLI
* GitHub Copilot
Some agents share the same global skills folder. Desktop may show them together as **Compatible agents**. Connecting that bundle installs ByteRover once for every agent that reads from the shared folder.
## Open the agent connection screen
During first setup, Desktop opens **Connect your agents** after sign-in.
After onboarding, open the same controls from Desktop:
* select **Add agent** if no agent is connected yet
* select **Manage agents** if you already connected one or more agents
## Connect your agent
Find the agent you use for development, then follow the action shown in Desktop.
| Desktop action | Meaning | What to do |
| ----------------- | ------------------------------------------------------- | ---------------------------------------------------------------------------------------------------------------------------- |
| **Connect** | Desktop can install the ByteRover skill for this agent. | Select **Connect**. |
| **Connected** | The ByteRover skill is already installed. | Restart the agent if you just connected it, then onboard with ByteRover. Use **Disconnect** if you need to remove the skill. |
| **Update** | The agent has an older ByteRover skill installed. | Select **Update** to reinstall the latest bundled skill. |
| **Install Guide** | This agent requires manual setup. | Open the guide and follow the steps shown in Desktop. |
Most agents are connected directly from Desktop. Claude Desktop uses an install guide because its skill upload is manual.
When you are in first setup, select **Continue** after the agent connection step.